
For the longest period of time that you are using your Mac, pretty sure you have a lot of files, applications, and other stuff in it. And believe it or not, you might also a lot of files or other data that you no longer need on your Mac. And the more that you make them stay, the more they occupy space on Mac.
And once that you space on your Mac is full, then you might be able to experience some issues on your Mac such as slow performance, the application keeps on crashing or not loading at all, cannot browse the internet than the usual, cannot save new files, and more.
That is why from time to time, you will be needing to give your Mac a clean. So, for you to get started, we are going to show you some ways on how to free up space on Mac.
Part 1: Know Why Your Mac is Running Out of Space
Before we go ahead and show you how you could free up space on your Mac, it is a must that you need to know or identify why your Mac is running out of space. So here is what you will be needing to do.
Step 1: Go ahead and click on the Apple menu which can be found at the top left corner of your screen.
Step 2: From there, go ahead and choose “About This Mac”.
Step 3: After that, go ahead and click on the Storage tab that you see on your screen.
From there, you will be able to see on your screen a variety set of the colored graph. That graph indicated the data that is taking up your Mac. And with the use of that graph, you will be able to know which of your files are dominant when it comes to occupying space on your Mac.
Being able to see what is taking up the space of your Mac is actually a great idea. And a nicer idea is that if you could take a look at what the folders contain for you to know if you still need them or not. If you found files that you no longer need, they might as well remove or delete them from your Mac for you to free up some space.
Part 2: How to Free Up Space on Mac – The Most Efficient and Fastest Way!
Now, there is one way that you can do so that you will be able to free up space on your Mac faster and efficiently. Do not worry because all of the tips that we will show you in the following parts are all ways as well on how to free up space on Mac manually.
However, if you would want to clean up your Mac and free up space faster than having it cleaned manually, then the iMyMac PowerMyMac is for you.
The iMyMac PowerMyMac is considered to be as a powerful all-in-one tool that you can use for you to be able to clean up your Mac. This tool can do a really good job when it comes to cleaning up all of the files and applications that you no longer need in your Mac.
This tool can become whatever it is that you want. It can be an uninstaller that will allow you to uninstall all the apps that you no longer need on your Mac. This means that all of the files that are associated with the application will also be deleted from your Mac.
It can also be a cleaner wherein you can make use of it to remove all of the files and other data that you no longer need in your Mac. You can remove your duplicated files, your caches, large and old files, your email junks, and so much more.
Now, to know how to use the iMyMac PowerMyMac to free up space on your Mac, here is a guide that you can follow. We are going to show you how you can clean up your System Junk first as an example. The System Junk on your Mac is the folder wherein you will be able to find your system cache, application cache, system logs, user logs, and your localization.
So, to start with, just go ahead and download the iMyMac PowerMyMac and then installed it on your Mac. Once that this is complete, go ahead and proceed with the next step.
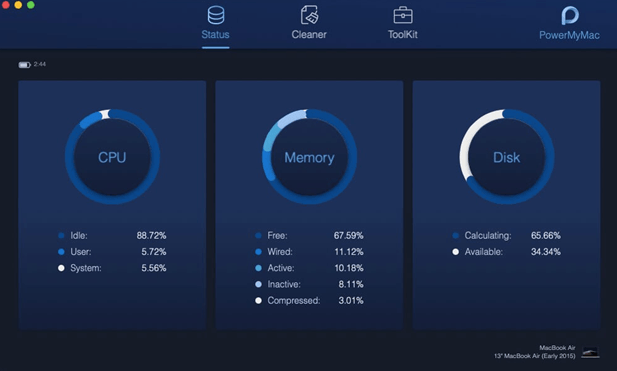
Step 1: Launch the Program
After installing the program, you can then go ahead and launch it on your Mac. Then on the main interface of the iMyMac PowerMyMac, you will be able to see the system status of your Mac. Meaning, you will be able to see your CPU usage, Memory, and as well as your Disk.
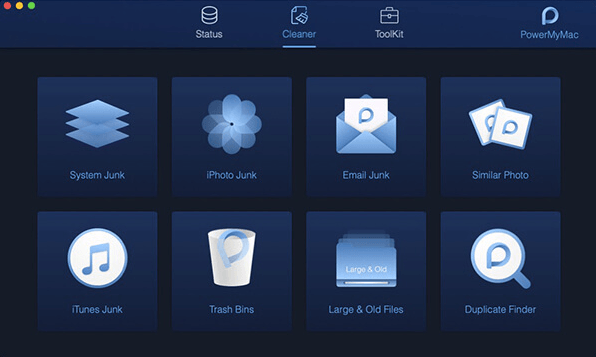
Step 2: Select A Module and an Option
After that, you can then go ahead and choose the Cleaner module located at the top of your screen. Then you will be able to see a lot of options under the module. From the list of modules, go ahead and choose System Junk.
Step 3: Scan Your Mac
Then go ahead and make a scan on your Mac by clicking on the “Scan” button on your screen. Wait until the scanning process is complete.
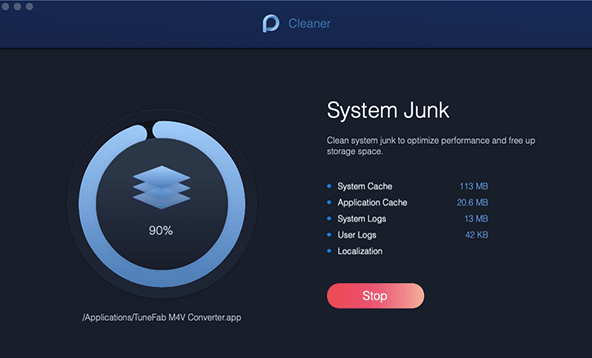
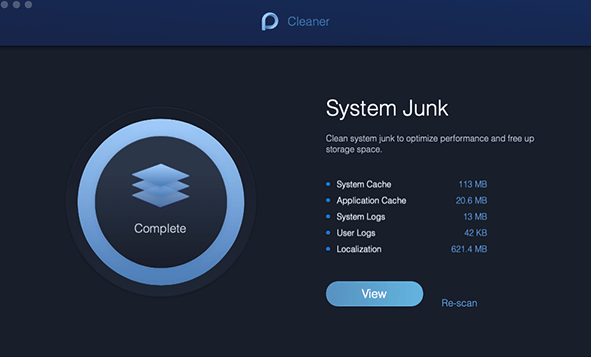
Step 4: See the Results
After the scanning process is complete, then you can go ahead and check out the result. It will be shown on your screen.
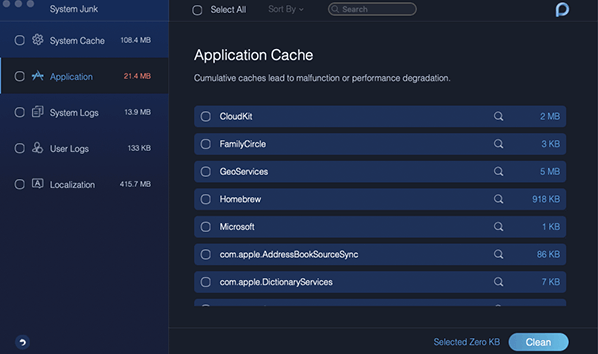
Step 5: Choose All The Files to Remove from Mac
Then on your screen, you will be able to see a set of list of categories. These categories will be located on the left side of your screen. And once that you click each category, all the files that it contains will then be shown on the right side of your screen.
From that list of files that you see, go ahead and choose all of the files that you want to delete from your Mac.
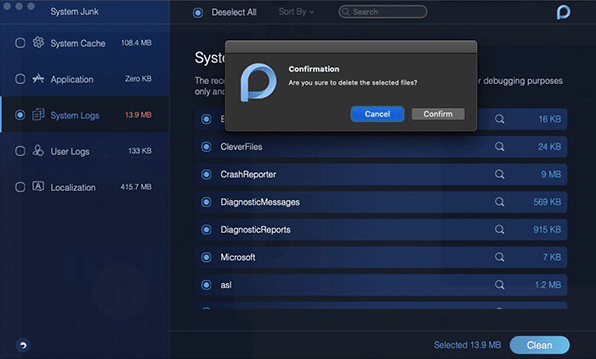
Step 6: Clean Up All Your System Junk
Once that you are done choosing all the files that you want to remove, then go ahead and simply click on the “Clean” button. And confirm the action by hitting on the Confirm button from the pop-up box that appears on your screen. Then the cleaning process will start and all you have to do is to wait until it is complete.
Part 3: How to Manually Free Up Space on Mac
There are a lot of ways on how you can free up some space on your Mac, and with that, we are going to show you some of the necessary things that you should do when you are running out of space on your Mac.
Tip #1: Get Rid of Unwanted Applications on Mac
If you are one of those people who loves to have a lot of applications on their Mac but does not actually need or use them, then you might want to consider on removing them instead and keep just those that you really need.
This is because if you keep on storing applications that you really do not need or use on your Mac, then those apps will take more of your storage space and can result in your Mac to performer slow.
Here is how are some ways on how you can uninstall applications that you no longer need on your Mac.
For Applications that you got from Mac App Store
- Go ahead and run the Launchpad on your Mac.
- Then, simply click and hold down the application that you want to uninstall.
- Once that you see the application moving or jiggling, go ahead and hit on the “X” button.
For applications downloaded from the Internet
- Go ahead and open Launchpad on your Mac.
- Then, simply choose the application you want to uninstall.
- Then go ahead and drag the application on your Trash.
- After that, empty your Trash.
Though you have to be reminded that doing the steps that we have shown you, there are still files that are left behind. And with that, you have to look for all those residue files of the application you uninstalled and have them deleted from your Mac. This way, you will be able to free up more space.

Tip #2: Remove Your Junks and Unwanted Mails
The junks and spam emails that you have stored on your Mac are one of the reasons as to why you are running out of space. That is why having them deleted from your Mac will help you gain more of your storage space for you to save new files. And in order for you to remove your junks and deleted your emails, here is what you will be needing to do.
Step 1: Go ahead and launch Mail on your Mac.
Step 2: Then go ahead and hit on “Mailbox” from the Mail menu.
Step 3: After that, go ahead and choose “Erase Deleted Items” and “Erase Junk Mail”.
Tip #3: Remove Your Browser Cache
If you are the type of person who uses their Mac in accessing the internet more than using anything else, then you might have a lot of browser caches stored in it.
These browser caches are the ones that you leave behind every time you access a certain website. So, over the time that you are using it, you are also stocking up your browser cache which is one of the reasons as to why you are running out of space on your Mac.
So, for you to get rid of your browser cache, here is what you need to do.
Cleaning Up Browser Cache on Google Chrome
Step 1: Go ahead and launch the Google Chrome browser on your Mac.
Step 2: Then, go ahead and hit on the three-dot icon located at the upper-right corner of your screen.
Step 3: From there, go ahead and choose “More Tools” and then choose “Clear browsing data”.
Step 4: Then, go ahead and choose the time frame that you would want to remove on your browser cache.
Step 5: You can also clear “Cached images and files”.

Cleaning Up Browser Cache on Safari
Step 1: Go ahead and launch the Safari browser on your Mac.
Step 2: After that, go ahead and choose the “Develop” option located at the top menu of the browser screen.
Step 3: From there, go ahead and click on the “Empty Cache” for you to clear your browsing cache.
Tip #4: Remove All Your Duplicate Files
In using your Mac, there come some times that you might have downloaded more than one copy of a file. And with that, these duplicate files that you have on your Mac will actually eat up a lot of space.
So, for you to be able to free up space on your Mac, then you should start removing those duplicate files that you have. You can do this manually, or you can make use of a tool that will help you find and remove all of your duplicate files.
Tip #5: Erase Your Download Folder
The downloads that you make on your Mac are also the ones that are eating up a lot of space on your Mac. So, this is also one of the main things that you might want to consider removing from your Mac.
So for you to be able to delete the items on your Download folder, all you have to do is to launch the Finder app and then choose the Downloads folder. From there, you can now go ahead and delete the files that are under your Downloads folder. You can go ahead and sort them according to the size of the file.
You should also check on the folders that you see because every time that you try to launch an archive file on your Mac, this file automatically unzips into a folder.
Part 4: Conclusion
Cleaning up your Mac is a necessary thing to do every now and then. This is for you to be able to free up space on your Mac. This way, you will be able to get your Mac to perform faster, and that you will be able to save more files that you need.


1 Comment
One important caveat that I learned while attempting this solution: if you create a big file locally, and duplicate it over and over again with cmd+c/cmd+v or cmd+d, your disk space will not be properly filled up. This is an OSX trick to try and conserve hard disk space for duplicate files, by just creating new references to the original file instead of brand new copies of the file itself.
This is a good feature in most scenarios, just not in our immediate case where we actually want to fill up our disk as fast as possible.